How it began
Someone gifted me two (2!) old ETC ION, both not working
This was the older one of them. It was showing storage errors after booting so I swapped the HDD and asked ETC support for a Reimaging Kit which they offered me free of charge for download. You have to copy that image to a 64GB-USB-stick – not bigger or smaller.
I cleaned the ION and swapped fans for new ones, installed the image and now it’s working like when it was new. But it’s still based on WinXPe – that means latest EOS version you can install is v2.9.x
Another one
Like I said before I was gifted two IONs. The other one was is a bit newer. Originally it had the mainboard with 2x DVI ports. But due to an unknown reason to me the pre-owner swapped mainboard, CPU, RAM and HDD. It was still same generation (Socket 775, Core 2 Quad) but the mainboard had only a single VGA port. And the biggest problem: it wasn’t outputting any DMX.
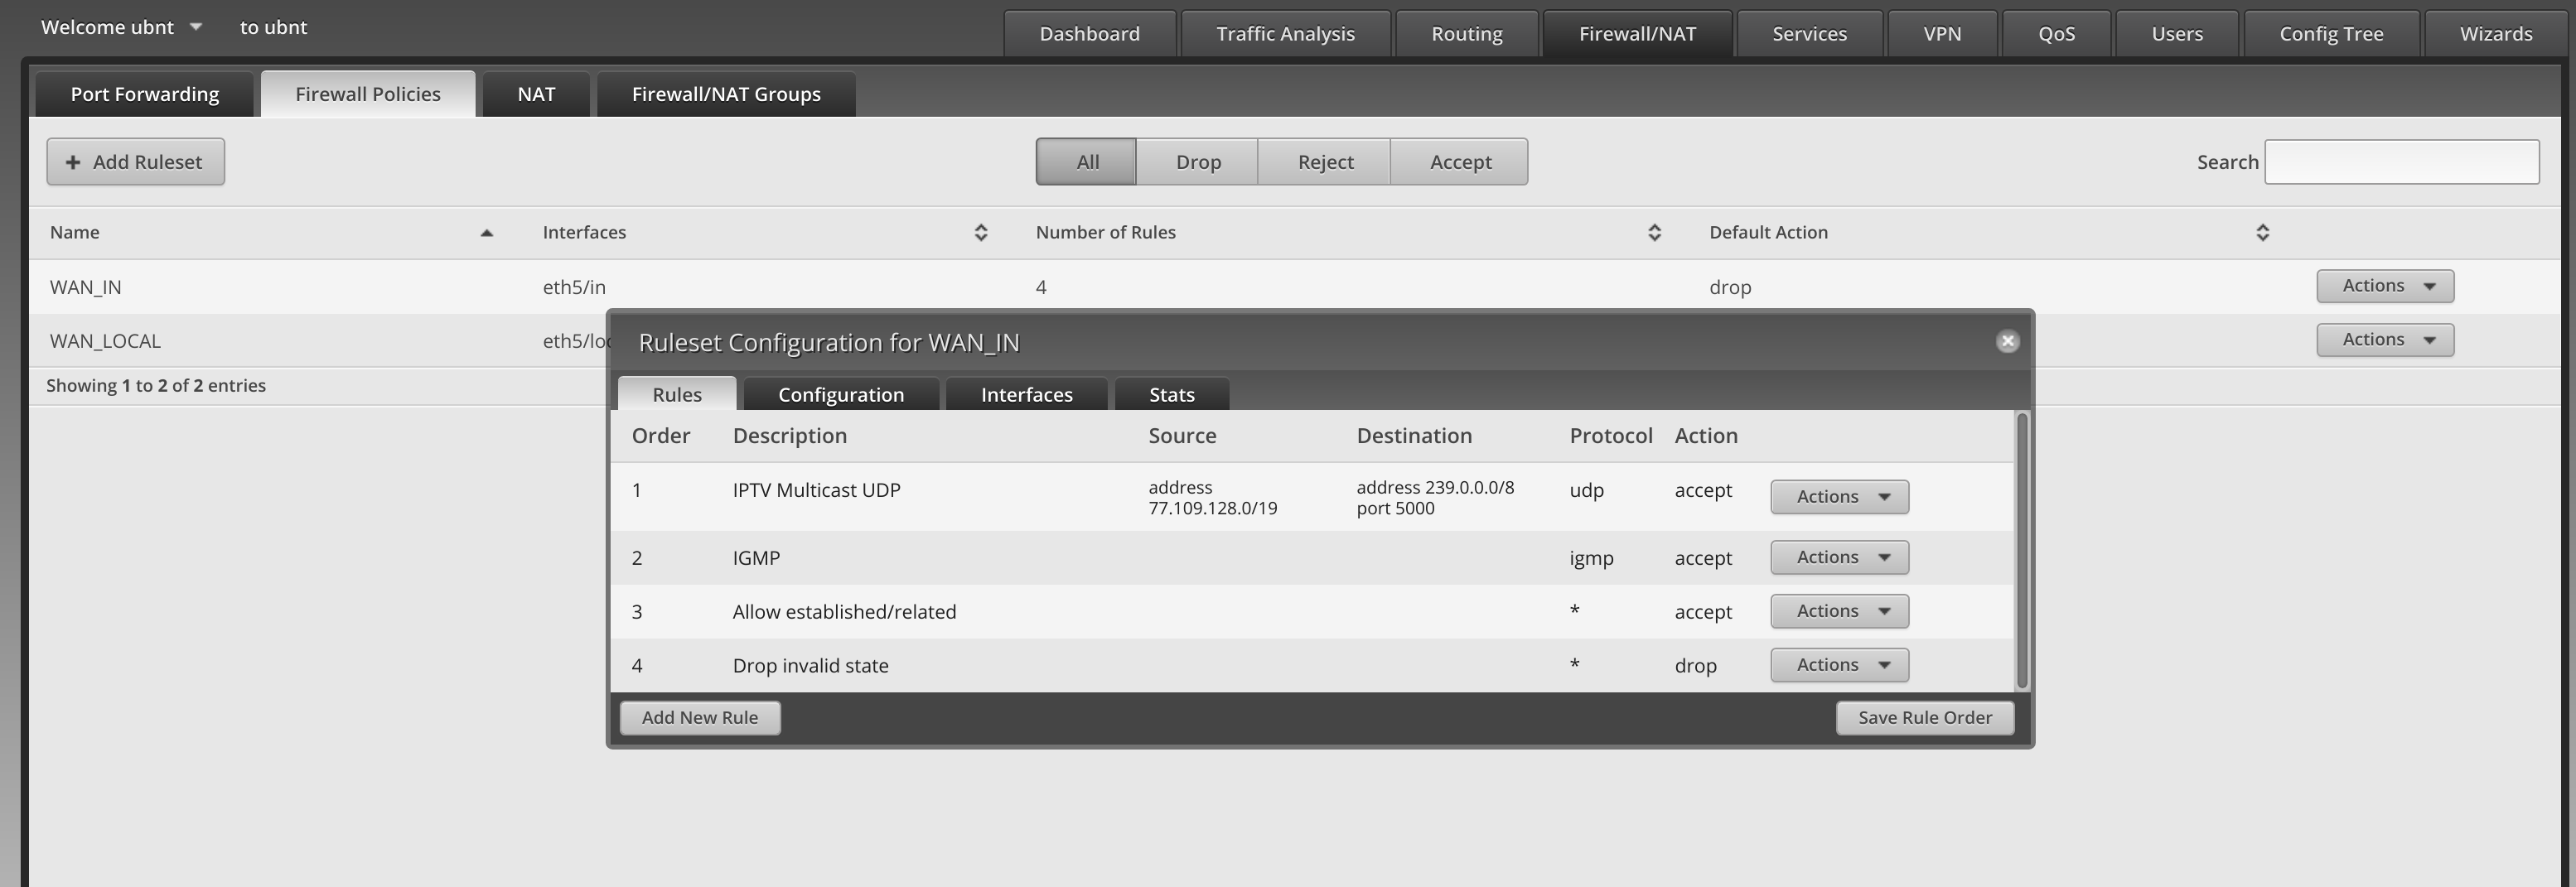
The reason was found easily in the „About“ tab. After patching 24 dimmer channels it showed „patched addresses: 24 of 0“. So there were 0 addresses/parameters unlocked. After opening the console I’ve seen the licence dongle is plugged in correctly but its red LED wasn’t lighting up. So there was a problem with that and I guess that’s a security feature of the dongle software which blocks access after a to big hardware change. It would have been solvable by reimaging that console too.
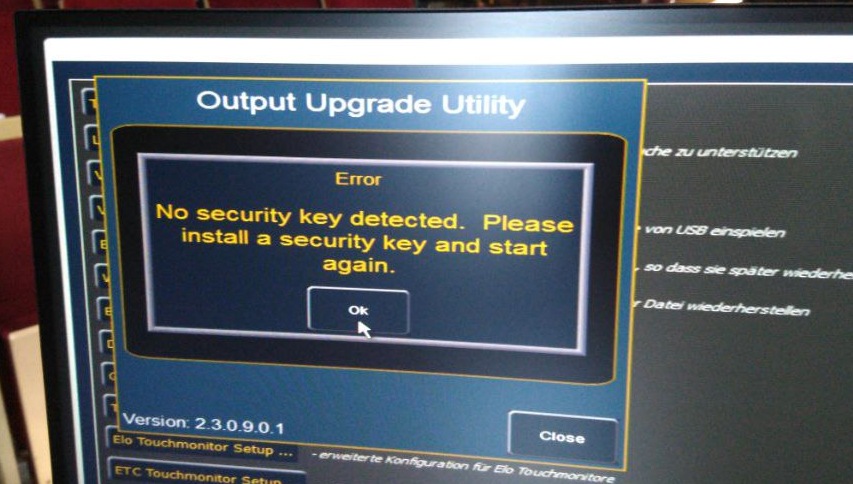
Picture showing ETC software saying „No security key detected“.
But what should I do with two old IONs? One is plenty enough and having latest software would be much more interesting. After searching a bit in the internt I’ve found a comment on reddit which indicated it would be possible to install plain Windows, install EOS software and that’s it: Reddit
First I tested it by myself with an generic old desktop computer. The facepanel of the ION is connected via standard internal USB 2.0 headers like they are used in desktop computers to connect front panel USB ports.
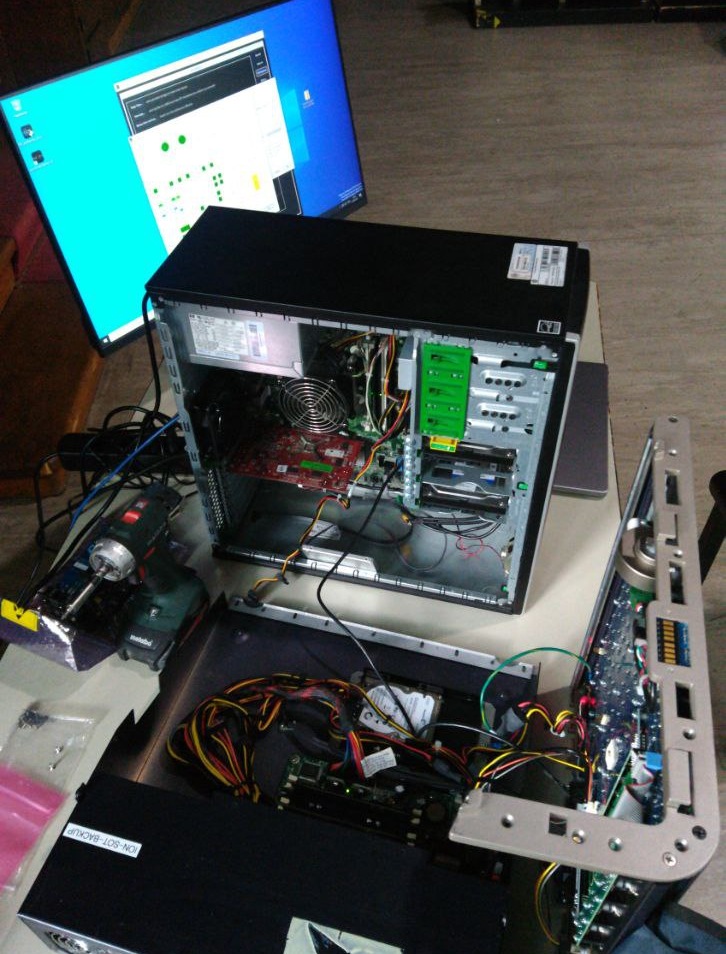
Facepanel directly connected to motherboard of desktop computer via internal USB-cable
On the desktop computer I’ve installed Win10 LTSC (evaluation version, free to download) and latest EOS software (v3.x). And it just worked. All buttons and encoders, even display working like a charme. So now there was the time to rework the whole console and bring it to the present.
new Hardware
First of all I wanted to swap the mainboard again. The one installed only had a single VGA port which is way out-of-date. It would had been possible to instal the adapter for Dual-DVI (via split cable) but I really dislike this solution due to it’s chunkiness.
So I was searching for a new mainboard: Micro-ATX or Mini-ITX, two LAN-ports and also two DisplayPort-ports. What I’ve found is the Mitac PH10FEU-H310, an industrial motherboard for 8th/9th gen Intel Core processors. A seller in Germany sells them for 100€ in a special offer (Shoplink).
On ebay I got a used Intel Pentium G5400T which is powerful enough and has a TDP of only 35W (which means less heat which means low noise). Also from ebay I got some RAM and a low profile cpu cooler.
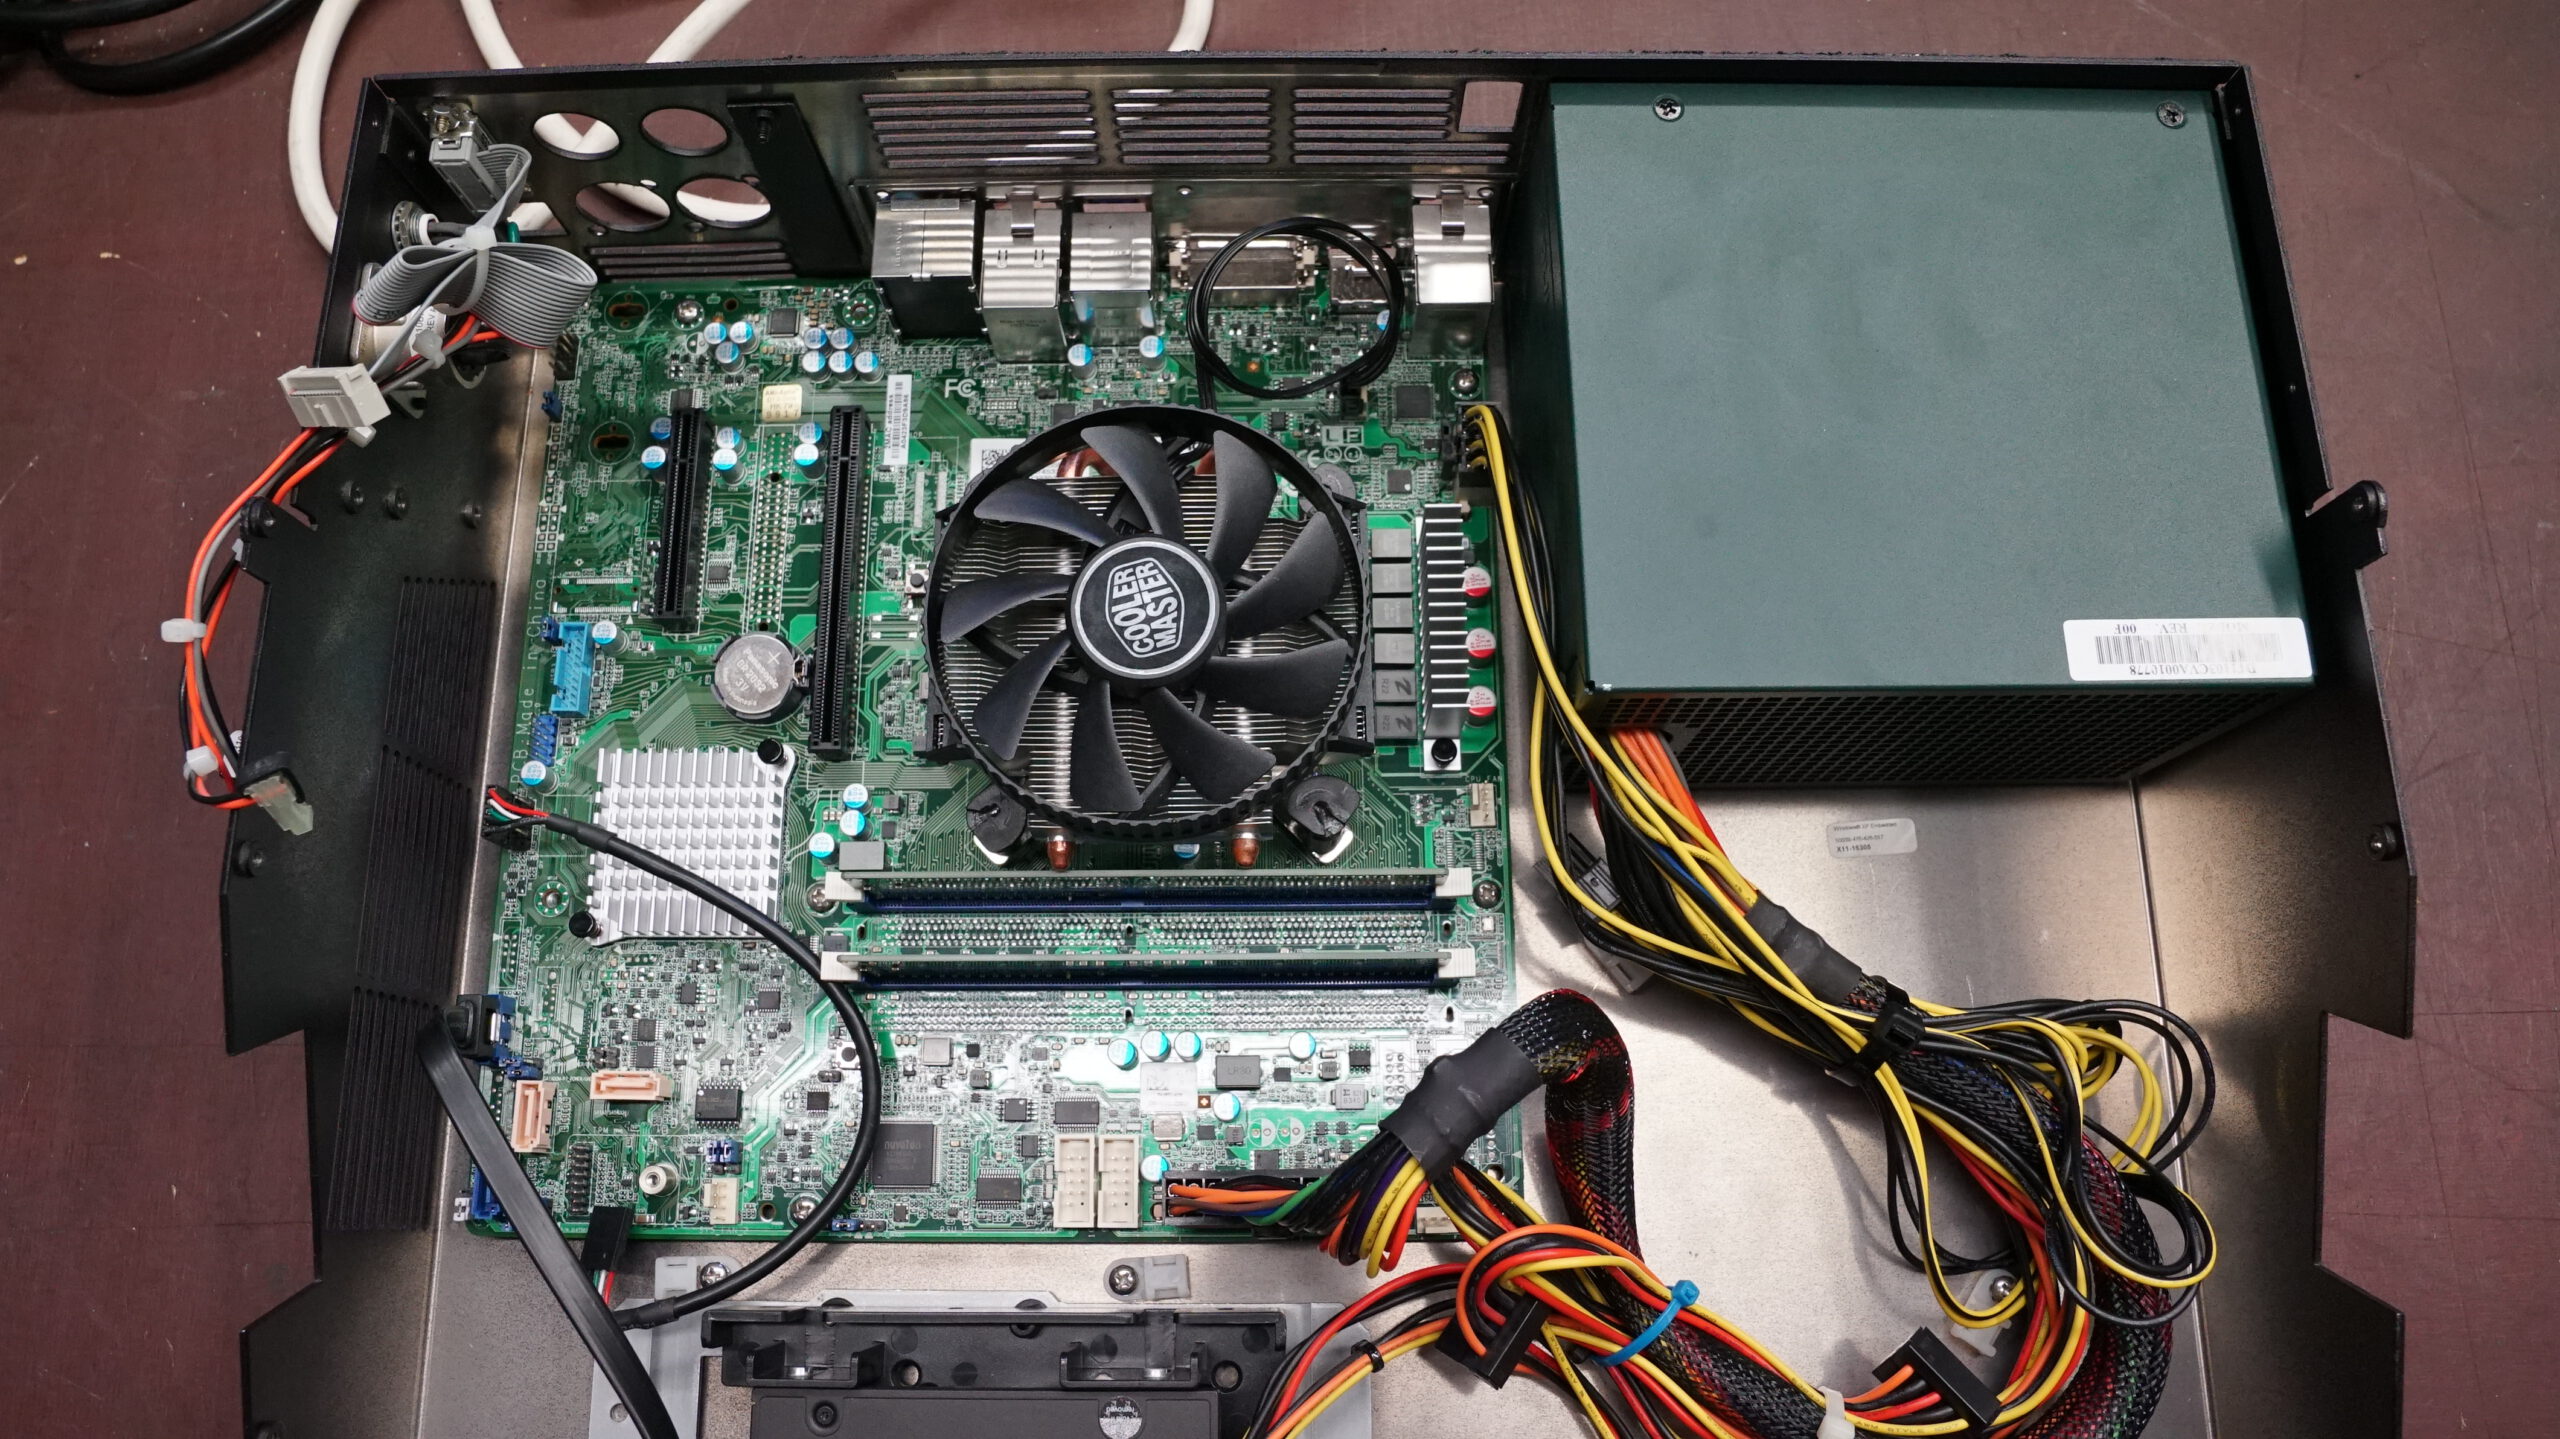
Installing the mainboard was quite easy since it’s all standard ATX components.
Only small downside of this particular mainboard is the USB2.0 header: first there is only one header (with 2 USB connections) and second it’s at a bad place. Originally the ION uses 3 USB connections: one for the I/O-board, one for the facepanel and one for the front USB port. But there are several solutions to it: you could install a small USB hub, the also exist for internal headers. You could re-equip the front USB-port with a USB3.0 port and thus use the internal USB3.0 header. Or you could just deattach someting else – that’s what I have done. Since I don’t use the side connectors for attaching a fader wing anyway I disconnected one of these (they are USB too) and connected front USB instead. These side connecters are connected to the facepanel which apparently has a USB hub integrated.
The second problem is the bad placing of the USB header: it’s underneath the I/O-board. That’s not a big problem, it still works, it just makes (dis-)assembling a tiny bit more complicated.
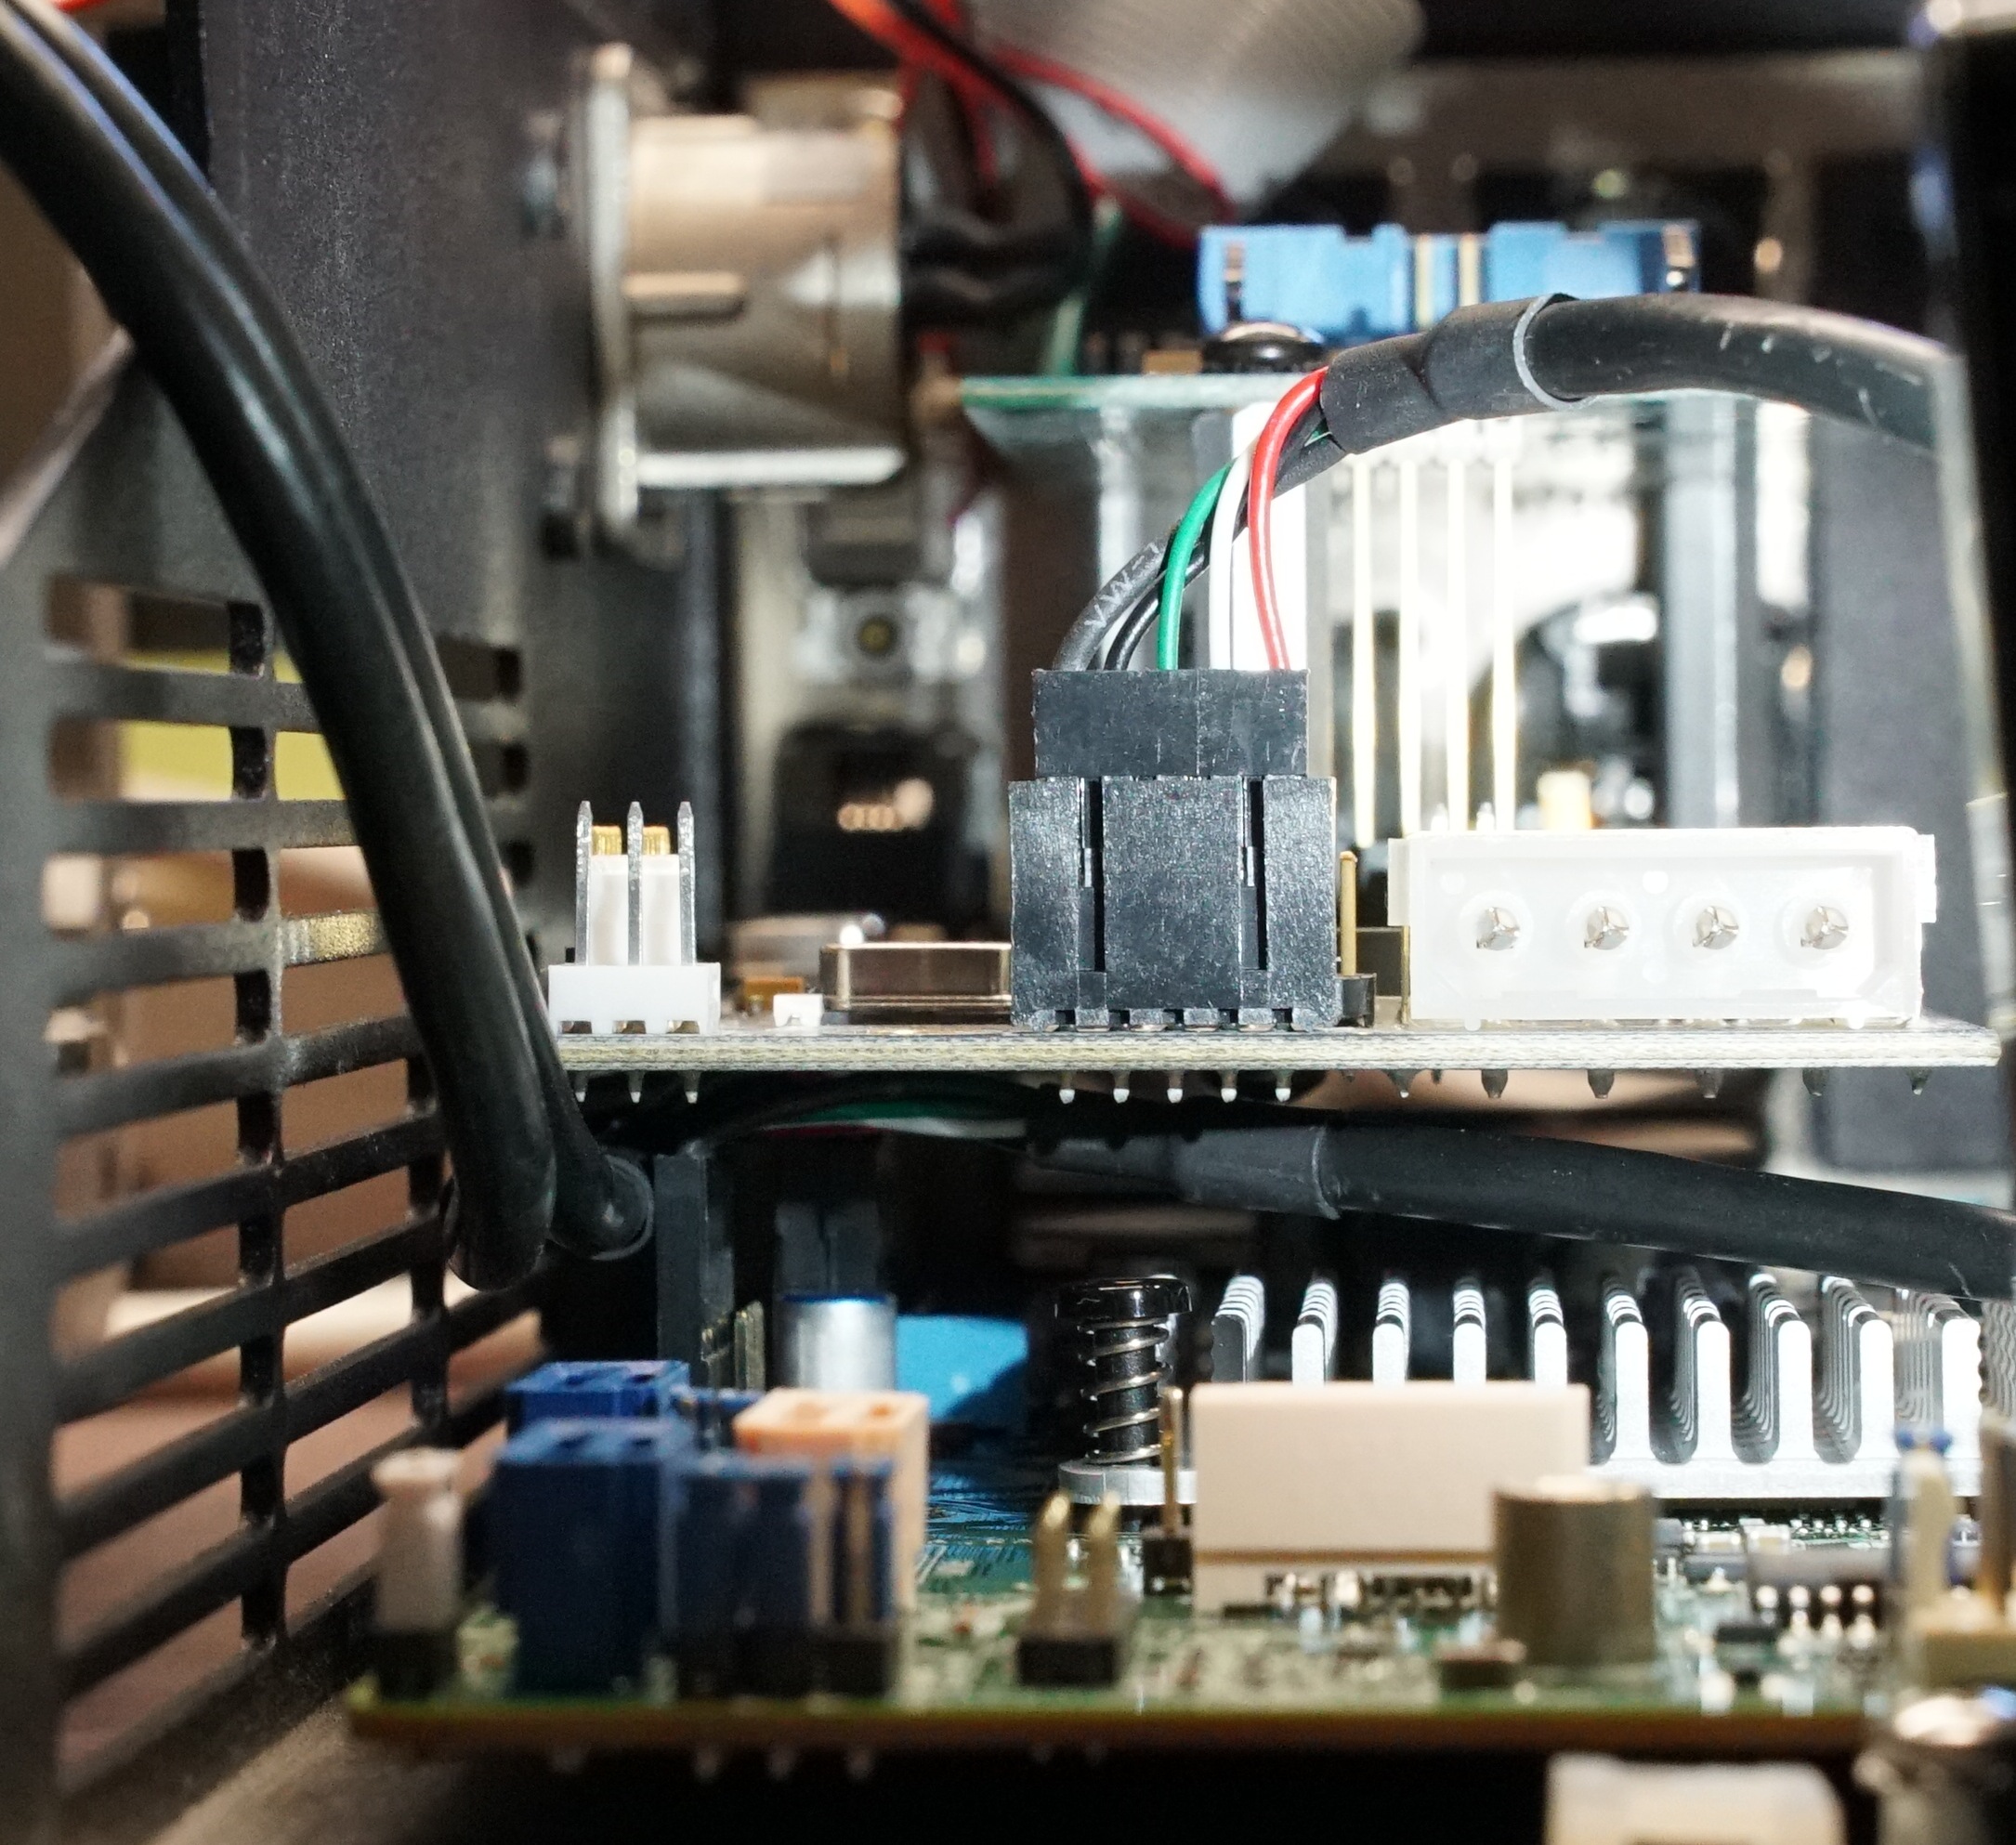
USB connectors fit tightly under I/O-board.
Don’t make the same mistakes like I did: the front panel header (for power button, LEDs etc.) looks the same like a USB header but it’s not. Double check correct installation direction of the USB connectors. Otherwise you have to remove I/O-board again and again and again… Stupid me was to excited I guess.
Once everything is installed you can boot the console, go to BIOS and setup everything to your expectations. I for myself deactivate everything I don’t need (serial ports, Audio, Intel ME, PXE boot etc.). But you also can keep everything to standard settings, no need to change anything.
Software
Now the hardware was working it was time for the software part. I got myself a used Windows 10 Enterprise LTSC licence. LTSC means Long Term Support Channel and is a slimmed down version of Windows which only receives security patches but no feature updates – exactly what I want to have. I bought that licence second hand because it’s almost impossible to buy enterprise licences as a private person. Even more if you need only one. (at least that applies to Switzerland and Germany, don’t know about other areas)
Beware to not download and install the evaluation image Microsoft offers – you can’t activate that! (there are some workarounds but it’s not worth the hassle)
The seller of my second hand licence provided me a download link for the correct image which I installed.
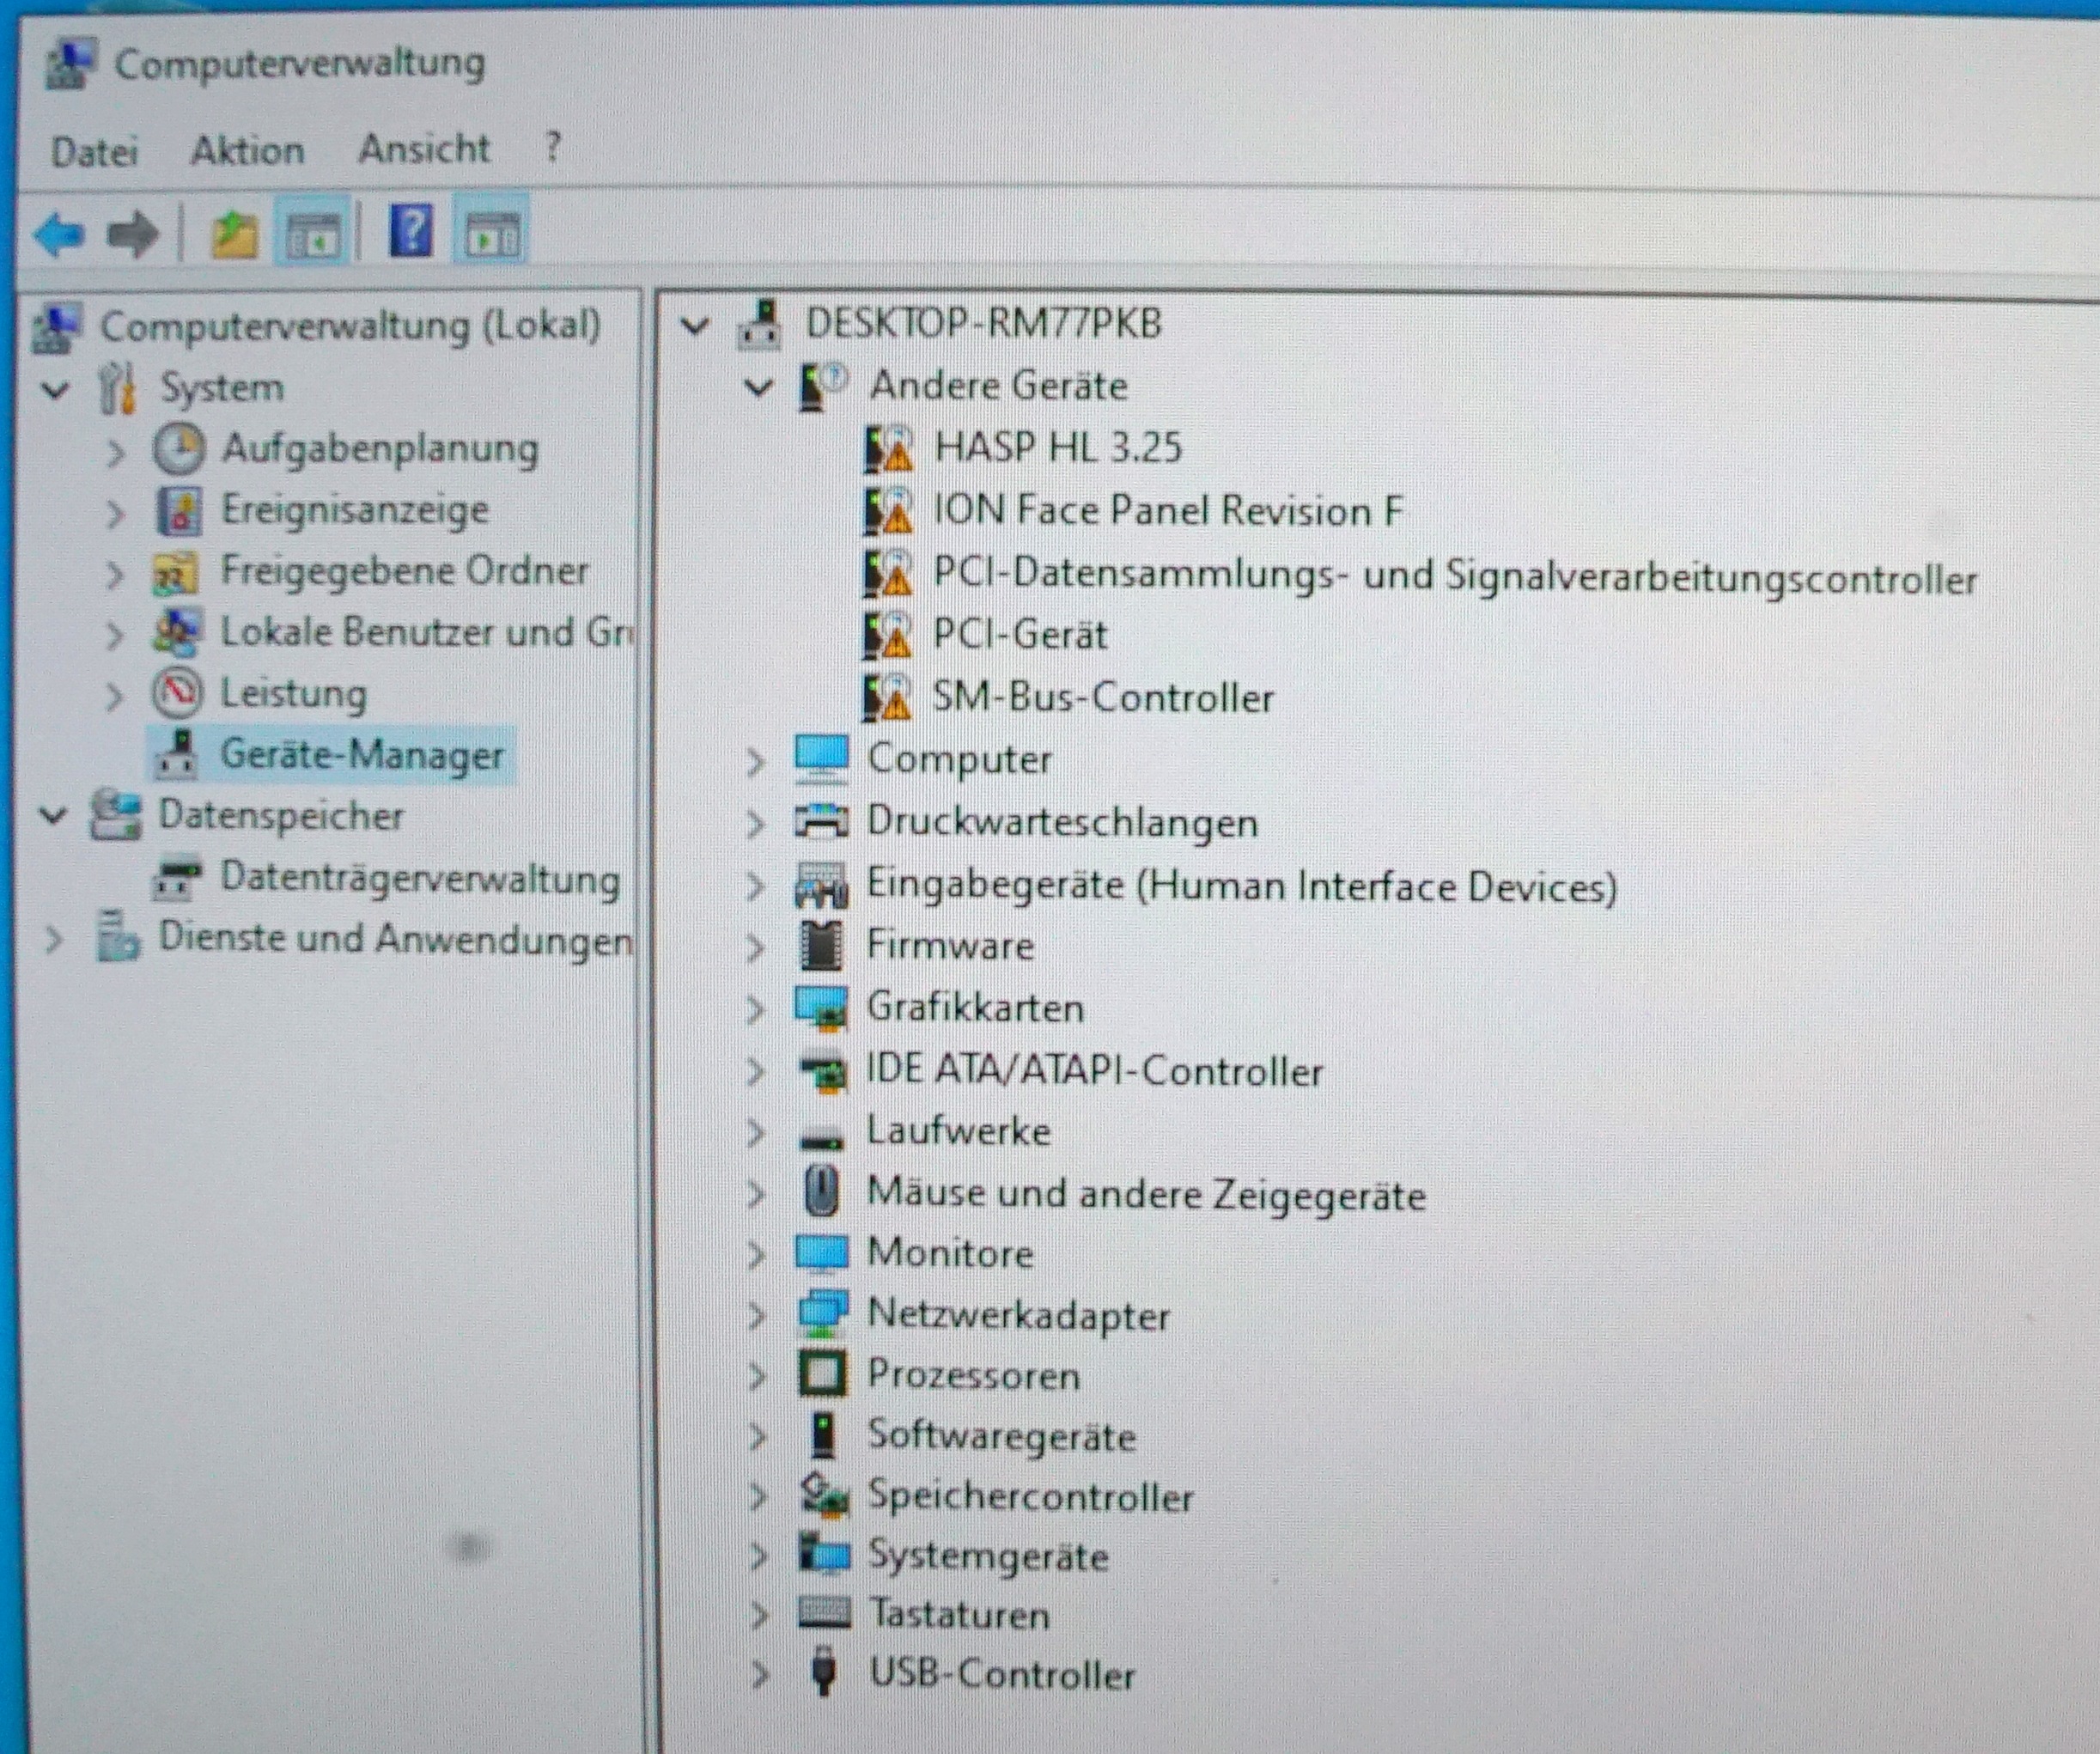
After first boot there are some unknown devices.
Now run a Windows Update, it will install some of the missing drivers. After that install EOS software – it will also install drivers for Face Panel, Fader Wing, Licence Dongle (HASP HL…), I/O-board and so on.
And now you are ready to go. Start EOS and it just works! Some tips:
- configure a user without admin rights for usage with EOS
- configure task bar to hide automatically
- autostart EOS (Win+R, run „shell:startup“, copy link to EOS software)
- in EOS settings deactivate „Open in „Shell“ E.C.U.“ so it will automatically start to Primary mode
Congratulations! Now you have a working ION console with latest software which almos feels like an originally one.
[proof by picture will follow maybe]